Acrylic cut quality
- Airflow wins. Strong air assist + effective exhaust prevent yellowing, reduce smoke staining, and suppress flame events.
- Focus is non-negotiable. Small defocus turns glossy edges into frosted edges and increases melt-back.
- Cast vs extruded behaves differently. Don’t expect one “universal preset” to work across acrylic types and brands.
- Use a test grid, not guesswork. Ten minutes of structured tuning builds a stable process window and avoids scrap.
- Repeatability comes from SOP. Optics cleaning, exhaust maintenance, and a shared material library matter more than “secret settings.”
Watch: Acrylic laser cutting walkthrough
A practical walkthrough of setup, airflow, focus, and the cut-quality checks that keep acrylic production stable.
Why CO₂ lasers are the default choice for acrylic
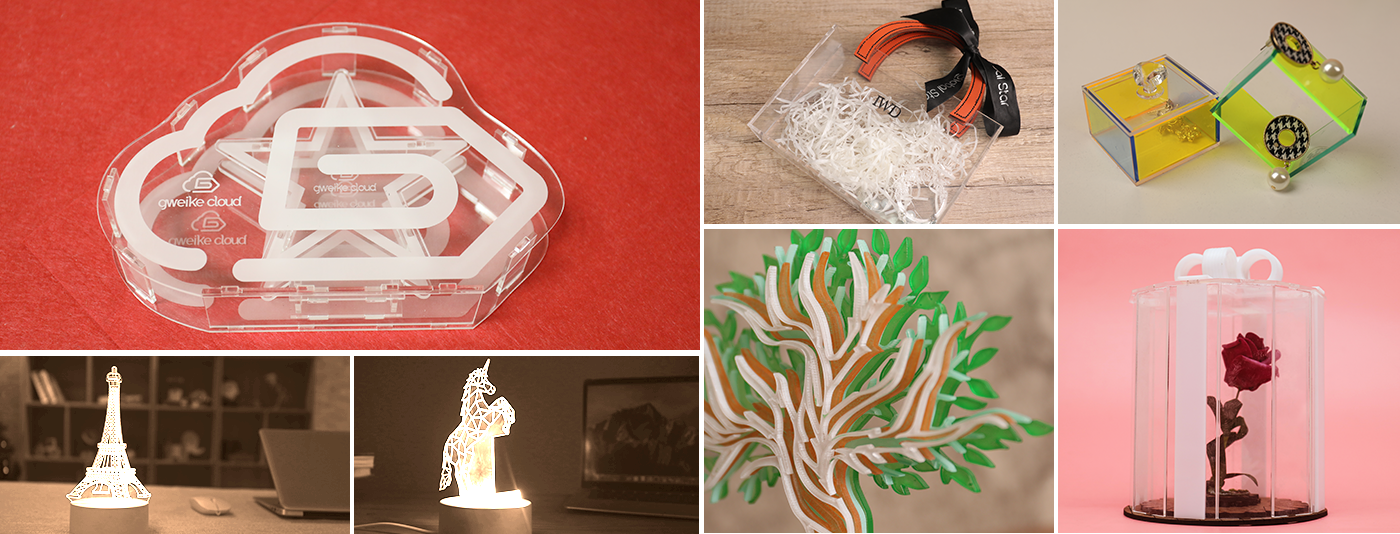
Acrylic (PMMA) is highly responsive to CO₂ laser processing because the CO₂ wavelength is strongly absorbed by many non-metals. In practical terms, that means a CO₂ beam can deliver energy efficiently into the kerf, producing consistent cutting and a visually clean edge—if airflow and focus are controlled.
In production, “good acrylic cutting” is not about a single magic setting. It is about maintaining a stable process window where energy density, focal position, cutting speed, and airflow stay balanced. If one variable drifts (dirty optics, weak exhaust, material batch change), defects appear immediately.
If you want the deeper cutting-process logic (why defects happen and why assist flow matters), read: How Does a Laser Cutting Machine Work?
Acrylic basics: cast vs extruded, colors, protective films
Cast vs extruded: why your edge quality changes overnight
Acrylic is not “one material.” Two sheets labeled “PMMA” may cut very differently. The biggest split is cast vs extruded.
- Cast acrylic is often chosen when you want better visual consistency, strong optical clarity, and a premium look. It typically engraves with a frosted appearance and can produce very clean cut edges when tuned correctly.
- Extruded acrylic is often more price-competitive and can cut well, but it is more sensitive to heat input and is commonly associated with melt-back (edge re-weld) if airflow and speed are not optimized.
Production note
If you buy acrylic from multiple suppliers, treat each supplier + thickness as a separate material profile. Build a small test-grid library once, then reuse it across shifts.
Color, additives, and “why black acrylic behaves differently”
Dark and highly pigmented acrylic can show smoke staining more easily. Mirror acrylic and coated sheets are also more sensitive to backside marks because the surface reflectivity can amplify heat effects near the table. If your priority is the cleanest possible bottom surface, table choice (knife vs honeycomb) and exhaust design matter.
Protective films: keep or remove?
Protective film can protect the top surface from smoke micro-staining, but it can also melt, shrink, and create edge contamination if the cut is too slow or the air assist is weak. In production, treat film strategy as part of the process plan: run a short test grid with film on/off for each acrylic type and lock the choice into your material preset.
Machine selection for production: bed size, power, Z, airflow, duty cycle
Machine selection should match the job you run weekly—not the extreme job you might run once a quarter. For acrylic production, selection is a structured decision across five dimensions: format, thickness window, setup repeatability, airflow & smoke management, and duty-cycle stability.
Quick selection checklist (what matters most for acrylic)
- Work area: choose based on your common panel size and nesting strategy.
- Power range: more power expands throughput and thickness capability, but does not replace airflow discipline.
- Z travel + autofocus: reduces setup time when switching thicknesses and fixtures; improves cross-shift repeatability.
- Dual platforms: honeycomb for engraving/small parts; knife blades to reduce backside marks on thicker acrylic.
- Filtration and exhaust control: critical for edge appearance and shop safety.
Three GWEIKE CO₂ formats to map to acrylic workflows
Option A: Desktop / prototyping / personalization
STORM600 — a compact 600×400 mm system with a stable 40–60 W CO₂ tube, manual Z table (autofocus optional), dual platforms, and tertiary filtration option.
- Best when: you run smaller parts, signage prototypes, personalization, or classroom-style training.
- Why it works for acrylic: fast setup, small footprint, clean cutting and engraving capability when airflow is correct.

Option B: Daily production for signage & displays
LC1390N — 1300×900 mm work area with 80–150 W power options, 180 mm motorized Z travel, autofocus, four-side pass-through for oversized workpieces, dual platforms, and optional three-stage filtration.
- Best when: you cut acrylic signage, lightboxes, display fixtures, and small-batch packaging daily.
- Why it works for acrylic: Z-lift + autofocus accelerate thickness changes; pass-through expands panel handling; filtration supports cleaner edge appearance.

Option C: Large-sheet cutting (wide panels, batch nesting)
LC1325D — a 1300×2500 mm cutting area format designed for large sheet materials, with independent fan control, dual platforms, and filtration options.
- Best when: your workflow depends on large sheets for throughput, nesting efficiency, or fewer sheet-change interruptions.
- Why it works for acrylic: larger format reduces join seams and enables higher utilization per sheet.

Safety & fume control: what you must not cut
Acrylic itself is a common CO₂ laser material, but a safe acrylic workflow still depends on fume control: consistent exhaust flow, clean ducts, and appropriate filtration sized to your duty cycle.
The non-negotiable rule: never laser cut PVC (vinyl) or any chlorinated plastic. It can release chlorine/acid fumes that are hazardous to people and corrosive to machine components.
If you need a formal material policy and safe substitutes, use this internal reference: Do Not Cut PVC: Alternatives & Substitutes
The professional workflow: file → setup → cut → inspection
Acrylic cutting becomes repeatable when you treat it as a controlled workflow, not a one-off craft. If you want a full operator checklist that applies to every job, see: How to Use a Laser Cutting Machine
Step 1 — File discipline (prevents re-cutting and edge burn)
- Remove duplicate lines (double cutting overheats edges instantly).
- Cut order: inner holes first, outer contours last.
- Keep small parts on bridges/tabs if airflow can blow them free.
- Use layers (engrave/score/cut) so each operation has its own parameter set.
Step 2 — Setup discipline (table choice + exhaust + air assist)
- Use knife blades for thicker acrylic when backside marks are unacceptable.
- Confirm exhaust flow before you start (weak exhaust causes yellow edges and smoke haze).
- Confirm air assist is stable and centered (airflow is part of the cutting process, not an accessory).
Step 3 — First-article validation (before you commit a full sheet)
- Check cut-through and bottom edge quality on a small corner sample.
- Inspect edge: glossy vs frosted; yellowing; melt-back at the exit side.
- Confirm dimensional accuracy on a known feature (slot width or hole diameter).
Focus discipline: lock focal distance and avoid drift
Acrylic is sensitive to focus because edge appearance is directly tied to energy density in the kerf. Slight defocus increases the heat-affected zone and makes edges wider, hazier, and more prone to melt-back.
- Standardize your focusing method (same tool, same reference surface, same routine).
- Re-focus whenever thickness or table height changes (fixtures, honeycomb vs knife table, stacked parts).
- Use autofocus where available to reduce operator variation across shifts.
Parameter tuning with a test grid (process window method)
The fastest way to dial in acrylic is a structured test grid. Instead of guessing, you map a small “window” of speed and power (and optionally frequency/PPI) and identify where the edge becomes clean, glossy, and fully cut-through.
Build a test grid in 10 minutes
- Pick one acrylic type + one thickness (treat each supplier and thickness as a separate profile).
- Lock airflow/exhaust to your normal production state.
- Lock focus (this is a focus test as much as a parameter test).
- Run a 4×4 grid: speed steps left-to-right; power steps top-to-bottom.
- Record results: cut-through, edge appearance (glossy/frosted/yellow), bottom marks, and melt-back.
Start-point library template (copy this table into your material preset sheet)
| Material | Thickness | Goal | Passes | Power | Speed | PPI/Freq | Air assist | Notes |
|---|---|---|---|---|---|---|---|---|
| Cast acrylic (supplier A) | __ mm | Glossy edge | 1 | __% | __ mm/s | __ | On / High | Film on/off; knife vs honeycomb |
| Extruded acrylic (supplier B) | __ mm | Throughput | 1 | __% | __ mm/s | __ | On / High | Watch melt-back; keep exhaust stable |
Tuning matrix template (how to record and decide)
| Test ID | Power step | Speed step | Focus offset | Edge result | Bottom result | Decision |
|---|---|---|---|---|---|---|
| A1 | P1 | S1 | 0 | Glossy / Frosted / Yellow | Clean / Marked | Keep / adjust airflow / adjust focus |
| A2 | P1 | S2 | 0 | ... | ... | ... |
Clean-edge tactics: reduce yellowing, frosting, and backside marks
Yellow edges: usually an airflow + heat balance problem
Yellowing is not just “too much power.” It is typically a sign that hot vapor and smoke are staying too close to the cut edge (weak exhaust, poor duct routing, insufficient air assist, or overly slow speed). In practice, you reduce yellowing by improving material removal from the kerf: stronger assist flow, stronger extraction, and a faster/more stable cut.
Frosted/hazy edges: focus and energy density are drifting
When the edge looks “frosted” rather than clean, the most common causes are slight defocus, dirty optics, or an unstable process window where the cut is barely maintaining cut-through. Re-lock focus, confirm lens cleanliness, then use a small test grid to relocate the stable window.
Backside marks: table choice and exhaust flow matter
If the bottom edge shows marks or haze, treat it as a table/exhaust problem first. Knife blades often reduce backside staining on thicker acrylic by reducing contact and back-reflection effects; stable extraction prevents vapor from recirculating under the sheet.
Preventing melt-back and micro-cracks
Melt-back (edge re-weld / sticky edge) happens when the cut remains too hot and molten material is not removed efficiently. Typical contributors are slow speed, weak airflow, and extruded acrylic sensitivity to heat input.
- Increase airflow and exhaust stability before you reduce power.
- Move toward a faster, stable cut window rather than “slow and hot.”
- If film is melting into the edge, test film-off or change film type.
Micro-cracks and stress cracking risk increases when acrylic is overheated, cooled unevenly, or mechanically stressed immediately after cutting. For parts that will be bent, solvent-bonded, or installed under load, prioritize a stable process window over maximum speed.
Troubleshooting matrix: symptoms → causes → quick fixes
| Symptom | Most likely cause | Quick test | Fix (priority order) |
|---|---|---|---|
| Yellow edge | Weak exhaust, low air assist, speed too slow, smoke recirculation | Run a small cut with exhaust at max and air assist high | Increase exhaust/duct efficiency → increase air assist → shift to faster stable speed window |
| Frosted/hazy edge | Defocus, dirty optics, unstable process window | Re-focus and re-run one row of the test grid | Clean optics → lock focus routine → adjust power/speed window |
| Edge melt-back / sticky edge | Too hot for too long; poor kerf evacuation; extruded acrylic sensitivity | Increase airflow and speed slightly; compare edge feel | Airflow first → speed up into stable window → reduce power only if needed |
| Bottom marks / haze | Table contact, vapor recirculation under sheet, back-reflection effects | Switch to knife table or elevate sheet slightly | Knife table → improve extraction under sheet → optimize nesting spacing |
| Not cutting through | Power margin insufficient, focus incorrect, speed too high, optics contamination | Check focus + lens cleanliness; re-run at slower speed | Clean optics → correct focus → slow down → then adjust power |
Which GWEIKE CO₂ system fits your acrylic workflow?
Use the common job as the anchor: panel size, part size, daily throughput, and how often you change thicknesses.
- STORM600 — best for compact shops, prototyping, personalization, and small acrylic parts with fast setup.
- LC1390N — the stable daily-production format for acrylic signage and display fixtures, with motorized Z-lift and autofocus for repeatability.
- LC1325D — designed for large sheets and higher nesting efficiency when your workflow depends on large panels.
Need a fast material test?
If you share your acrylic type (cast/extruded), thickness range, panel size, and edge-quality goal, our engineers can recommend a process window and a machine format. Contact: https://www.gwklaser.com/contact/
FAQ
Can a CO₂ laser cut acrylic with clean, glossy edges?
Yes—when airflow/exhaust and focus are controlled. Glossy edges are typically achieved inside a stable process window where kerf evacuation stays consistent and the cut does not linger hot enough to yellow or re-weld.
Cast vs extruded acrylic: which cuts better?
It depends on your goals. Many shops prefer cast for premium visual consistency, while extruded can be cost-effective but may be more sensitive to melt-back if the process is too hot or airflow is weak. Treat them as separate presets.
Do I keep the protective film on during cutting?
Sometimes. Film can protect the top surface from smoke haze, but it can also melt into the edge if heat input is high. Run a quick film on/off test grid and lock the choice into your material library.
Why is my acrylic edge yellow?
Yellowing is most often a smoke/heat balance issue: weak exhaust, weak air assist, or a slow cut that keeps the kerf hot. Improve evacuation first (exhaust + air), then re-center your speed/power window.
Why is the edge frosted instead of clean?
Frosted edges are commonly caused by slight defocus, dirty optics, or a cut that is barely stable. Re-focus, clean optics, and re-run a small test grid to relocate the stable window.
What materials should I never cut on a laser?
Never laser cut PVC/vinyl or any chlorinated plastic. Use the formal policy and substitutes here: Do Not Cut PVC.
Related reading
- GWEIKE CO₂ Laser Cutting & Engraving Machines
- How to Use a Laser Cutting Machine
- How Does a Laser Cutting Machine Work?
- How to Laser Cut Wood (CO₂)
Need a Specific Process Window?
Our application engineers specialize in optimizing laser parameters for various acrylic brands and thicknesses. Contact us for a tailored parameter list or a free material test.