

Laser cleaning can support controlled mold maintenance by removing release-agent buildup, selected residue, light oxidation and coatings without abrasive blasting media or chemical stripping residue. It is most relevant when selective treatment, repeatable cleaning or reduced cleanup matters. The actual mold material, surface finish and contaminant must be tested before a production process is adopted.
Key Takeaways
- For molds, preserving texture, polish, dimensions and functional features matters as much as removing contamination.
- Test the real mold material and residue; do not assume a process suitable for one tool will suit another.
- Measure the full maintenance workflow, including downtime, handling, inspection and restart—not cleaning speed alone.
- Deep corrosion, pitting and mechanical damage may require repair rather than cleaning.
Why Mold Cleaning Needs a Different Approach
Mold maintenance is not simply a question of making a surface look clean. A mold may have polished cavities, engraved details, fine vents, textured areas, coating systems or tight dimensional requirements. An unsuitable cleaning method can create additional work if it changes the surface condition or leaves inconsistent residue in a critical area.
Laser cleaning is therefore best evaluated as a controlled maintenance process. Define what must be removed, which areas must not be changed and how the cleaned tool will be inspected before returning it to production.
Start with a requirement, not a machine setting: identify the mold material, finish, contamination, cleaning area and acceptable result before arranging a trial.
What Can Laser Cleaning Remove From Molds?
The result depends on the mold substrate, surface finish, residue chemistry, layer thickness and part geometry. The table below is a screening guide—not a substitute for a test on the actual tool.
| Contaminant or condition | Typical suitability | What to verify |
|---|---|---|
| Release-agent buildup | Often suitable for controlled local cleaning. | Check surface finish and required cleanliness before molding resumes. |
| Polymer or rubber residue | Case-dependent. | Assess residue thickness, mold geometry and cycle time on a sample area. |
| Light oxidation | Often suitable. | Confirm that pitting or deeper corrosion is not present. |
| Carbonized deposits | Test first. | Verify pass count, heat response and cleaning consistency in detailed areas. |
| Paint or selected coatings | Selective removal may be possible. | Identify the coating and provide suitable extraction. |
| Heavy corrosion or deep pitting | Limited or case-dependent. | Cleaning cannot restore material lost to corrosion; repair may be required. |
| Unknown residue | Do not process without review. | Identify the material and evaluate safety before testing. |
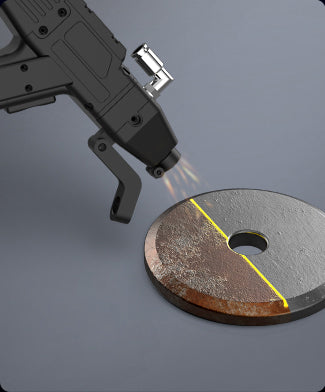
Common Mold and Tool Applications
Injection molds
Injection tooling can accumulate release-agent residue, polymer traces or light oxidation. A controlled local process may help clean cavities, edges or specific areas while avoiding unnecessary treatment of the full tool.
Rubber and tire molds
These molds may collect residue in patterns, vents and detailed surfaces. The priority is to verify that cleaning reaches the intended area without changing features that affect molding performance.
Die-casting molds
Deposits and oxidation may be concentrated around high-heat or high-contact regions. The trial should include the real operating condition and an inspection plan for critical surfaces.
Stamping and forming tools
Lubricants, transfer residue and light oxidation may affect tool maintenance. A selective approach can be relevant when only a defined contact zone needs treatment.
A Safe Mold-Cleaning Workflow
- Identify the tool and contamination. Record mold material, finish, coatings, contamination type, detailed features and the maintenance objective.
- Define the cleaning area. Mark the intended zone and identify surfaces, textures or coatings that must not be altered.
- Test a non-critical area. Use an actual sample or representative portion of the tool, with suitable extraction and safety controls in place.
- Inspect the result. Check surface finish, texture, engraving, venting areas and dimensions as appropriate for the tool.
- Confirm production performance. Return the tool to controlled production only after the required inspection and a representative forming or molding check.
For test-process setup, refer to the handheld laser cleaning parameters guide. It provides a starting framework, but mold-specific validation remains essential.
How to Protect Mold Finishes and Critical Features
Polished, textured, coated and precision surfaces should not be treated as interchangeable. The inspection method should reflect the function of the tool rather than relying only on appearance.
- Test polished and mirror-like areas separately from rougher external surfaces.
- Inspect engraved lettering, fine textures, vents, edges and deep cavities after a sample clean.
- Confirm that the selected cleaning area does not extend into surfaces that must retain a coating or finish.
- Use consistent part positioning and work instructions for repeat maintenance jobs.
- Record the verified process and inspection result for each mold family or surface type.
- Check the first production cycles after cleaning when surface condition can affect release or part appearance.
Do not use “brighter surface” as the acceptance standard. The required result may include texture retention, dimensional control, vent function, release performance or coating condition.
Laser Cleaning vs. Other Mold-Cleaning Methods
Method selection should be based on the actual deposit, mold finish, workplace controls and maintenance frequency. The same method is not automatically best for every tool.
| Method | Where it can fit | Main limitation to review |
|---|---|---|
| Laser cleaning | Selective and repeatable cleaning where low-media residue and controlled treatment are useful. | Requires mold-specific validation, extraction and a defined inspection process. |
| Chemical cleaning | Some oils, release agents or residues that suit an approved chemical process. | Requires handling, rinsing and disposal controls. |
| Dry-ice cleaning | May suit some low-residue maintenance workflows. | Evaluate effectiveness on the actual deposit and accessibility of detailed mold areas. |
| Blasting | Robust surfaces or larger deposits where surface finish is less sensitive. | May be unsuitable for fine mold finishes, textures or precision features. |
For the general application comparison, see laser cleaning vs. sandblasting vs. chemical stripping.
How to Assess ROI for Mold Maintenance
The cost of mold cleaning is more than the time spent with the cleaning tool. Evaluate the complete maintenance cycle and compare it with the current method.
- Planned and unplanned mold downtime.
- Tool removal, transport, handling and setup time.
- Labor, media, chemicals, waste and cleanup requirements.
- Inspection, polishing or repair required after cleaning.
- Time to return the mold to stable production.
- Expected frequency of cleaning and realistic equipment utilization.
Use the Laser Cleaning Cost per Hour and ROI guide to build the cost model with your local labor, utilization and facility inputs.
When Laser Cleaning Is Not the Right Choice
Laser cleaning should not be selected by default. Another method, repair process or specialist assessment may be more appropriate when:
- Deep corrosion, pitting or mechanical damage must be repaired rather than removed.
- A required surface roughness, coating condition or texture has not been validated after cleaning.
- The residue or coating composition is unknown and cannot yet be processed safely.
- Cleaning is very infrequent and the equipment will have insufficient productive utilization.
- The existing process is already effective, validated and less disruptive for the specific tool.
What to Prepare for a Mold-Cleaning Trial
A useful test starts with a representative tool condition. Share the following information when requesting an evaluation:
- Mold type, base material, surface finish, coatings and critical features.
- Photos or samples showing the actual contamination and its location.
- Current cleaning method, time, consumables and downtime.
- Required result: appearance, texture, release performance, vent function or dimensional condition.
- Expected maintenance frequency and workplace extraction requirements.
Need to evaluate laser cleaning for a mold? Share a representative sample or detailed photos, the contamination type and the required surface condition. GWEIKE can help identify the information needed for a controlled trial.
View LCW Cleaning SystemsLaser Cleaning for Molds FAQ
Can laser cleaning damage a mold surface?
An unsuitable process can affect a surface. Test the actual mold material, finish and contamination in a non-critical area, then inspect the result before production use.
Can laser cleaning clean polished or textured molds?
It may be suitable, but polished and textured surfaces require separate trials and inspection because their acceptance criteria can differ.
Can laser cleaning remove release agents from injection molds?
It can help remove suitable release-agent buildup, but the result depends on the residue and mold surface. Validate the process with a representative trial.
Does laser cleaning replace chemical mold cleaning?
No. The suitable method depends on contamination, required finish, material, workplace controls and production workflow.
How should a mold-cleaning process be validated?
Test a representative surface, inspect the relevant mold features, document the result and confirm performance with controlled production cycles where appropriate.